Return and Warranty Request
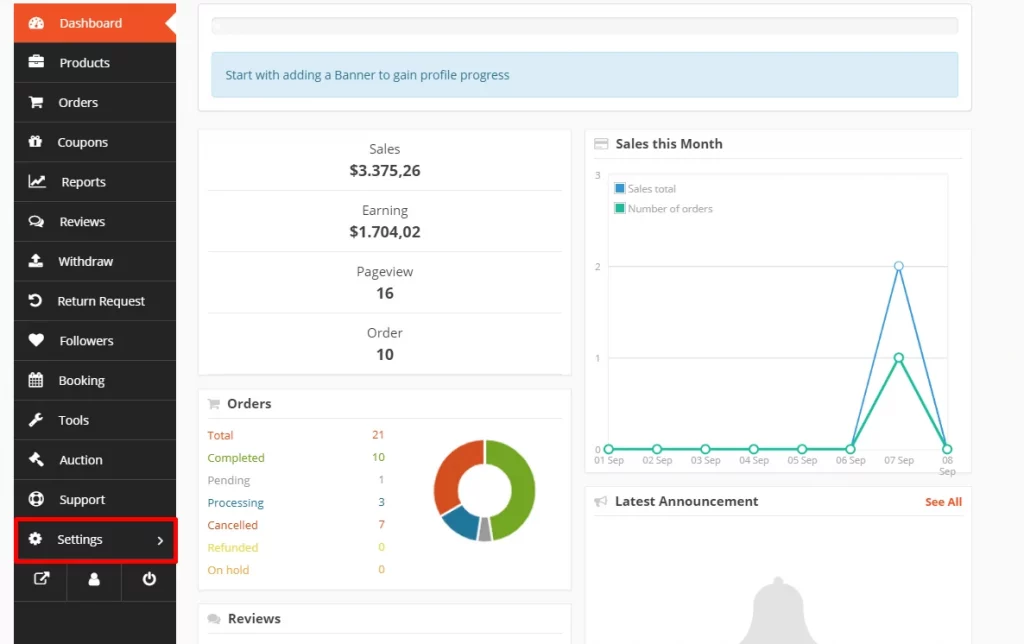
As any vendor, you would require to log in to your account and navigate through Vendor Dashboard → Settings.
Now, Select RMA.
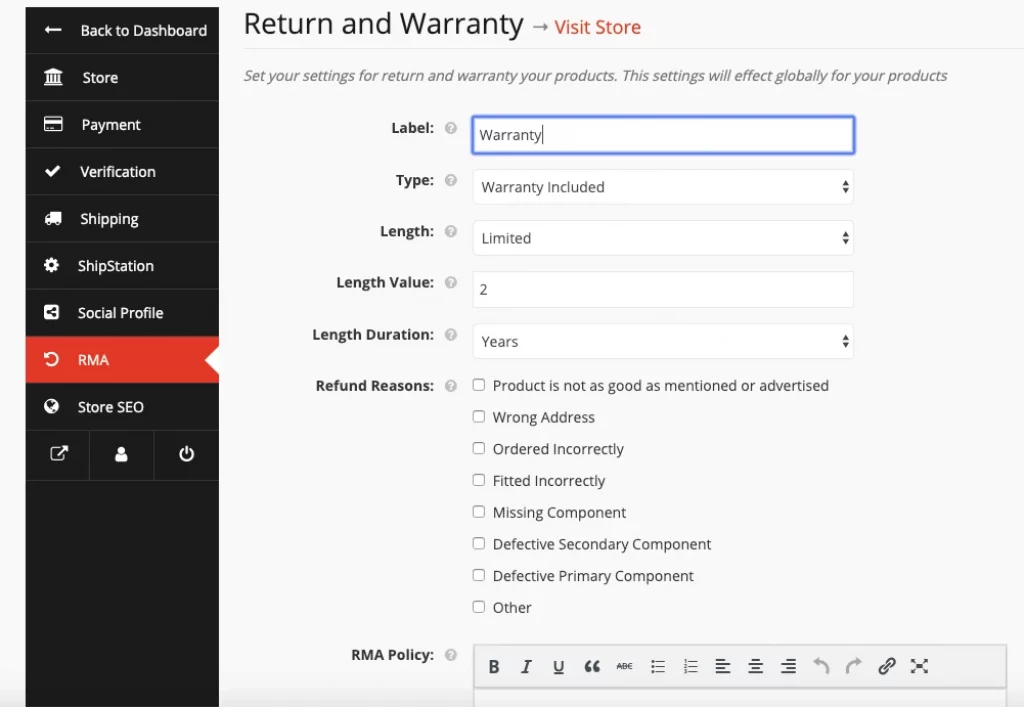
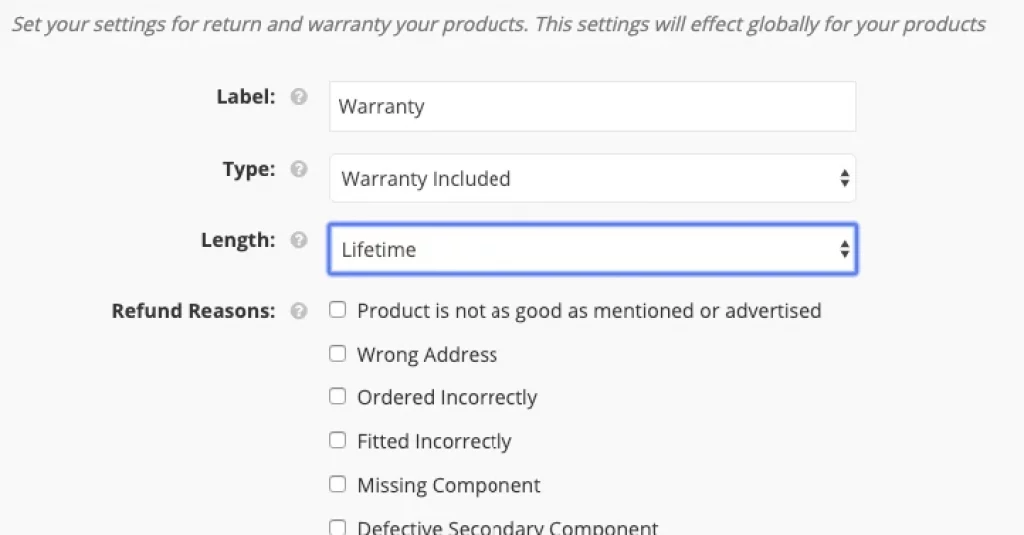
This is the part where you add a label to the RMA facility for the customers for your all products. In this case, it is labeled as ‘Warranty’. You can add any label of your choice.
There are certain dependencies on this option of warranty type. The dependencies are demonstrated below.
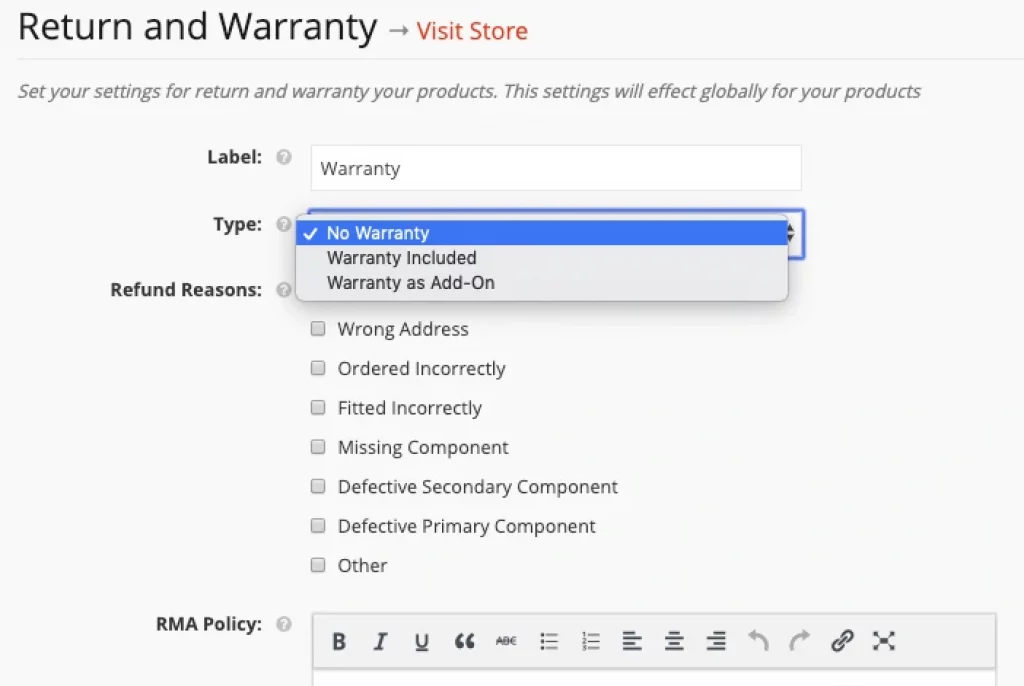
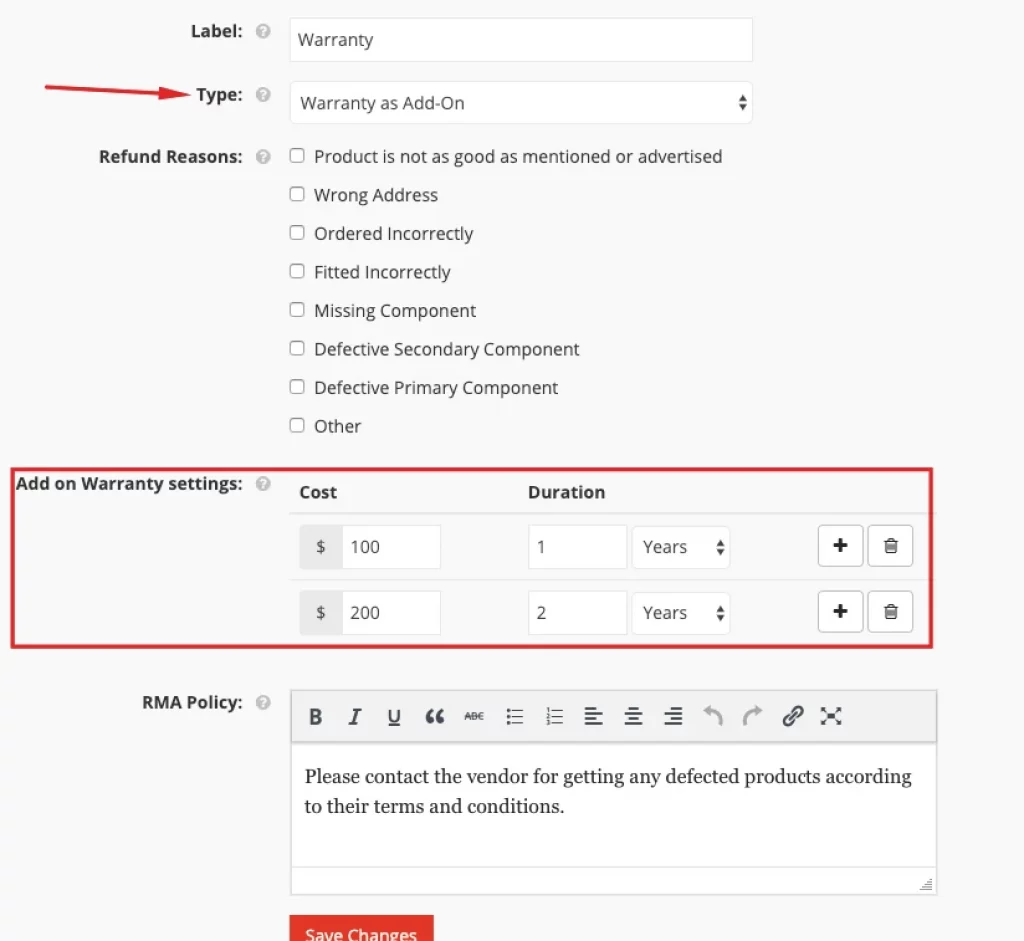
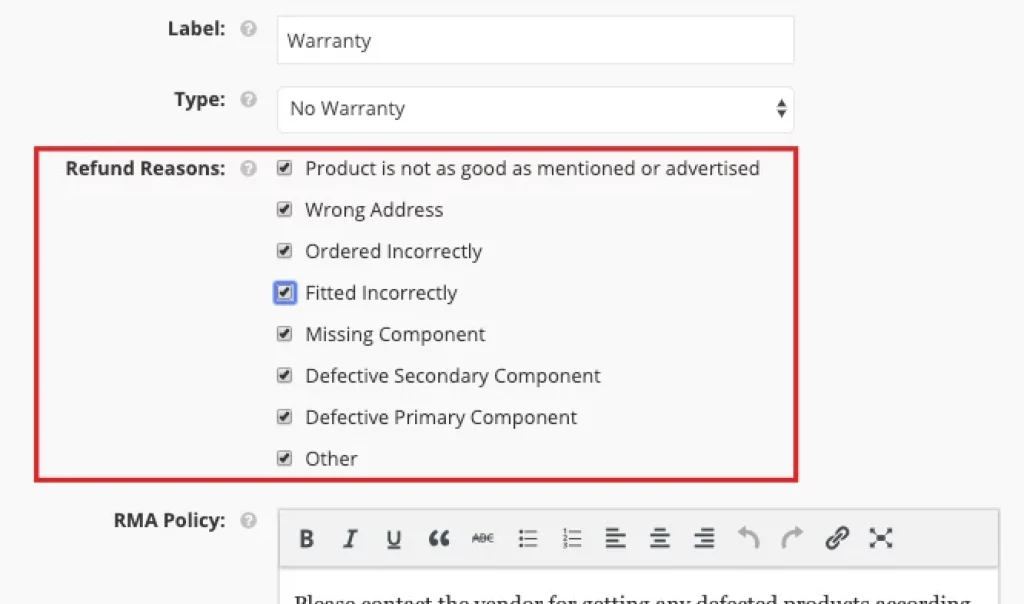
You can choose the type of warranty for the customers from here. Basically, there are three types of warranty to offer to your customers. No Warranty, Warranty included, and Warranty as Add-On.
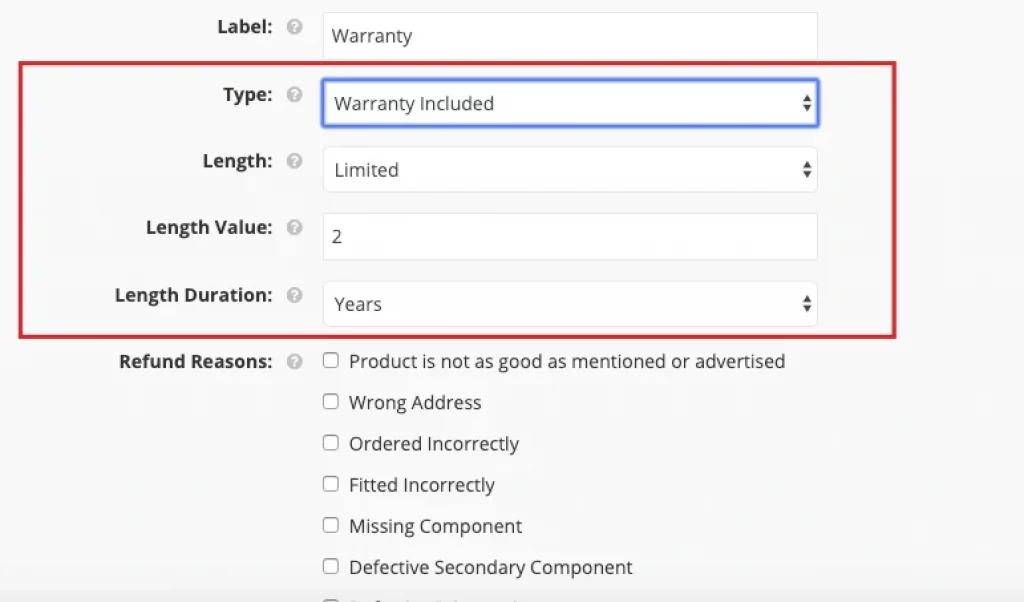
The type “No Warranty” will reveal no new option but selecting ‘Warranty Included’ will add three more options, Length, Length Value, and Length Duration as seen below.
The Length option is whether you are looking to offer the warranty for a Limited time or a lifetime.
Length Value is the value to be added for the warranty offered for any product.
Lastly, Length Duration is the term of the warranty in the form of Months or Years.
When the length of the warranty is selected to “Lifetime“, the “length value” and “length duration” options will get hidden as shown below.
When you choose this option of warranty type, you can allow the customers to choose an additional warranty period for an added cost. You can set that cost and duration from the Add-On warranty setting option as shown below.
This option displays all refund reasons set by the admin. Now you can choose to display the refund reason of your choice by checking the box that comes with your store and products.
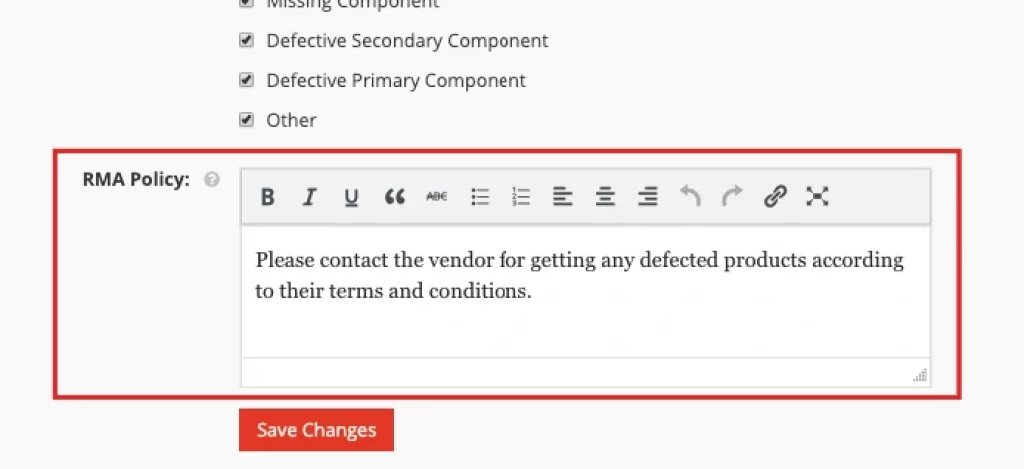
This is the return and warranty request policy set by the admin. You can set a policy of your own for the customers based on your store and products. (The text comment must be written in English.)
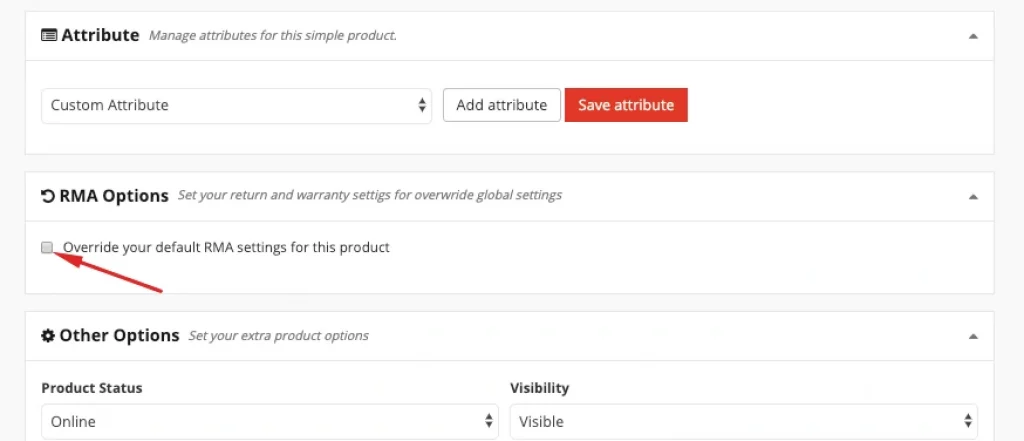
Apart from setting the RMA for all products, you can also set up RMA settings for an individual product.
To do so, you have to navigate to Vendor Dashboard > Products > Select a product > Edit > RMA Options (Check the “Override your default RMA settings for this product”)
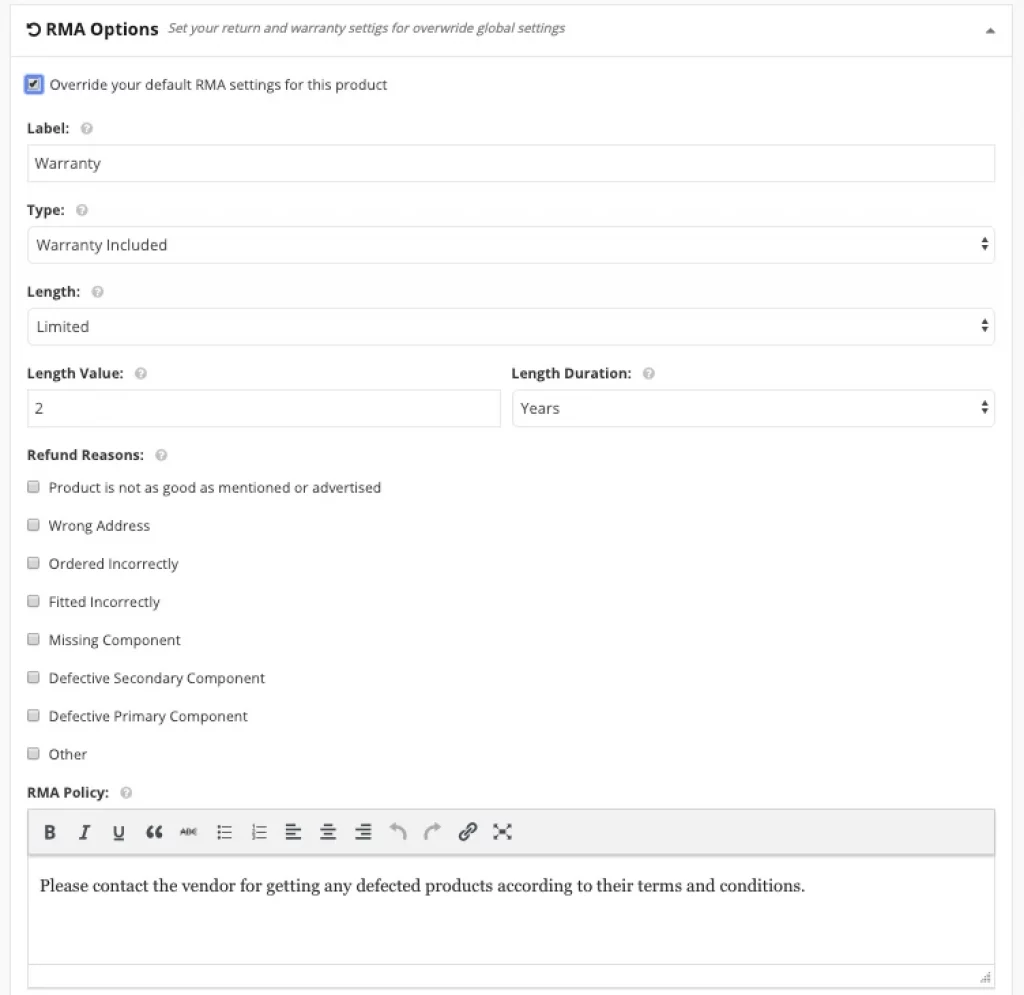
After that, you will get the options for setting up the RMA for this product as shown below.
The fields in this setting are the same as the fields in the global setting but here it works for this product only.
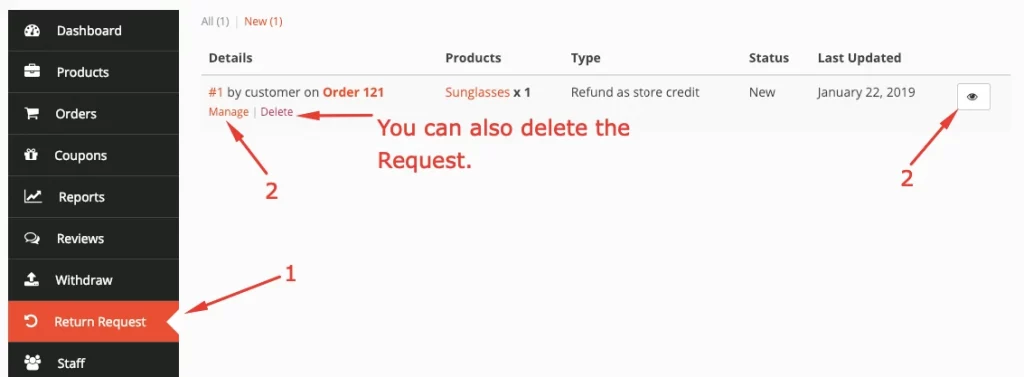
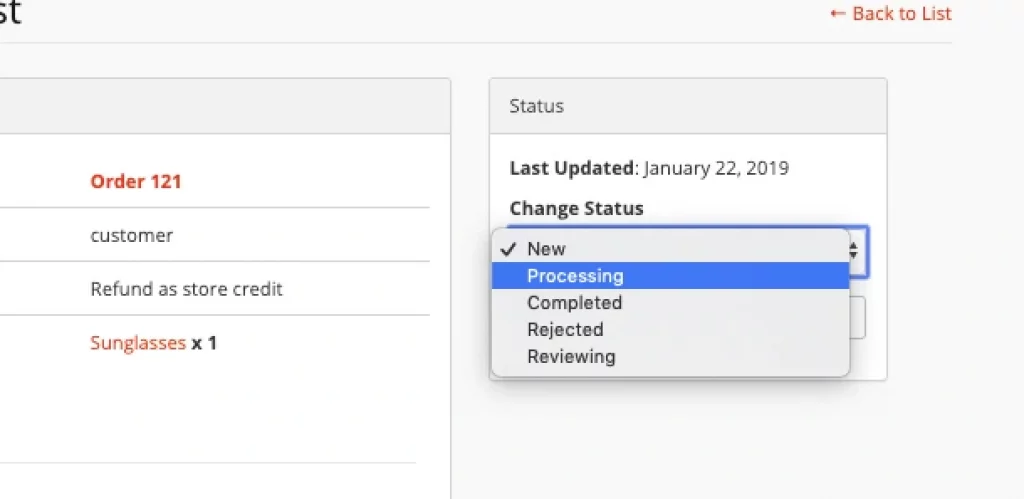
To manage customers’ RMA requests, you have to go to your Vendor Dashboard > Return Request > Select the ‘Manage’ or Click on the view icon.
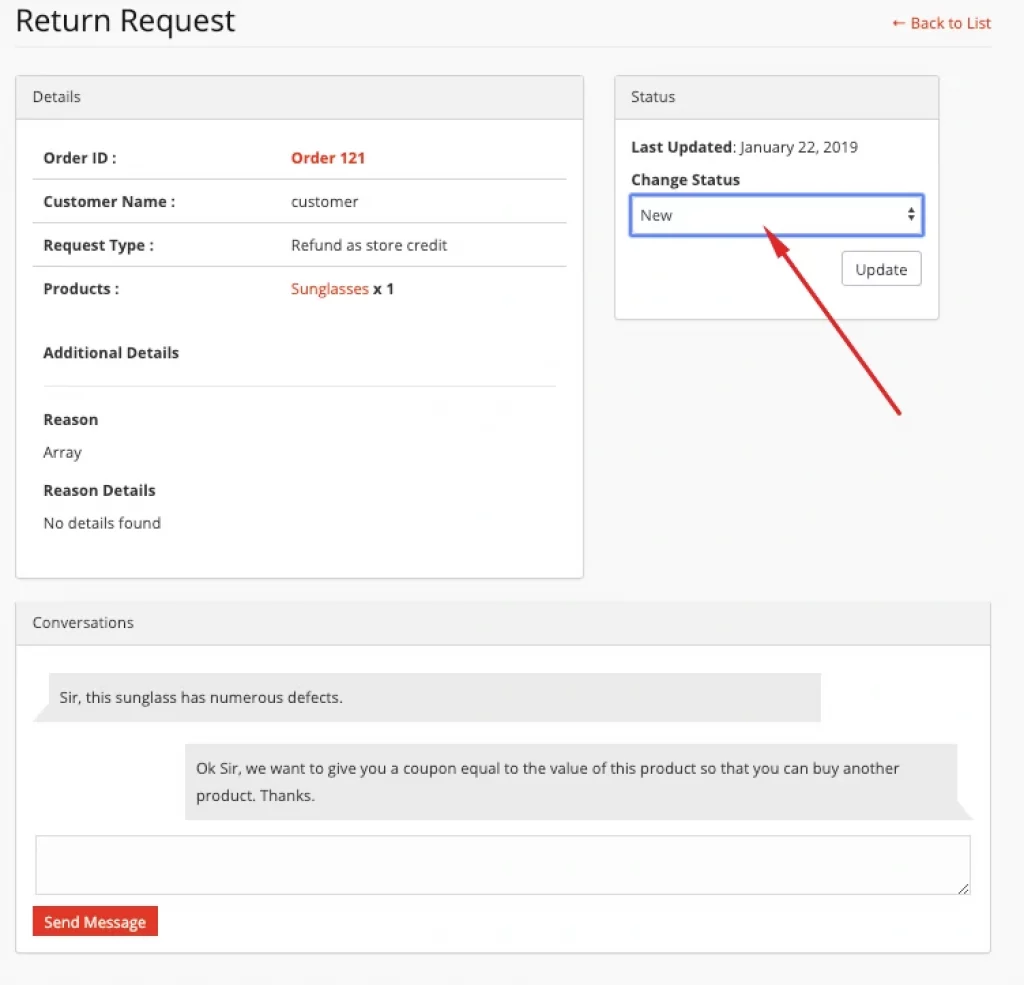
Next, your vendor will get options to chat with the customer and complete the return request. Moreover, you can change the status of the RMA request if you want to.
Here are the statuses:
Based on the settings applied by the admin and vendor, customers get to enjoy the RMA facility while buying their favorite products. Certain options are set as default for the customers. And for other options, they can choose their suitable warranty duration for an extra cost set by the vendors.
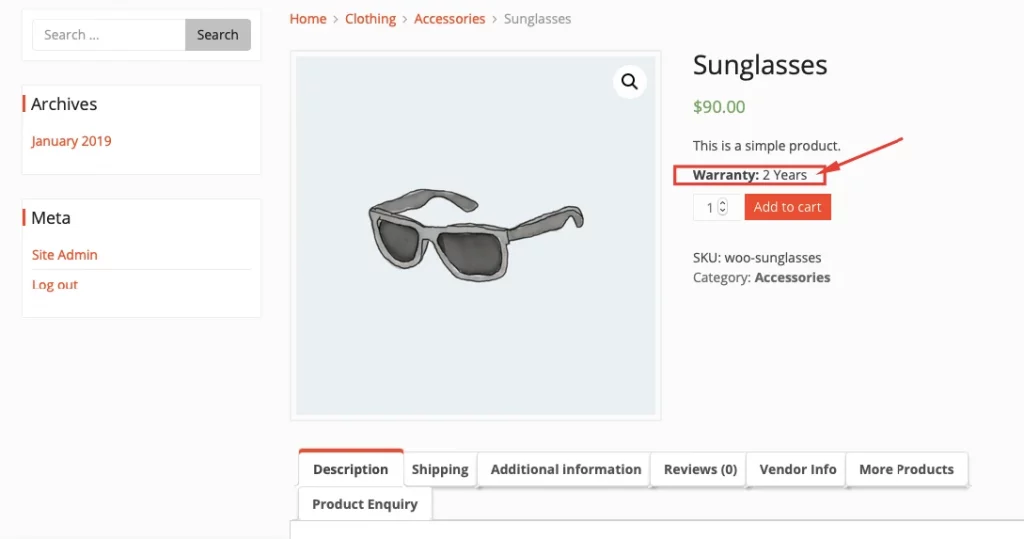
Here, for the customers, the warranty period is fixed for the ‘Warranty Included’ warranty type as seen below.
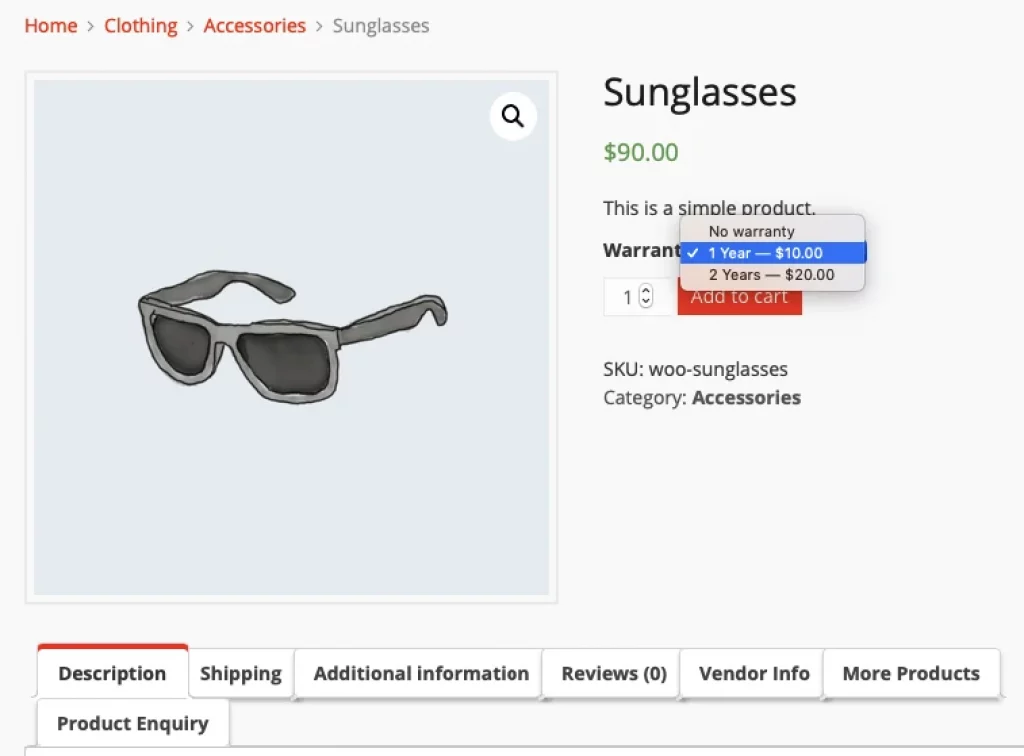
As for the “Warranty as Add-on” warranty type, the customers get to choose the provided warranty duration for some extra cost set by the vendors.
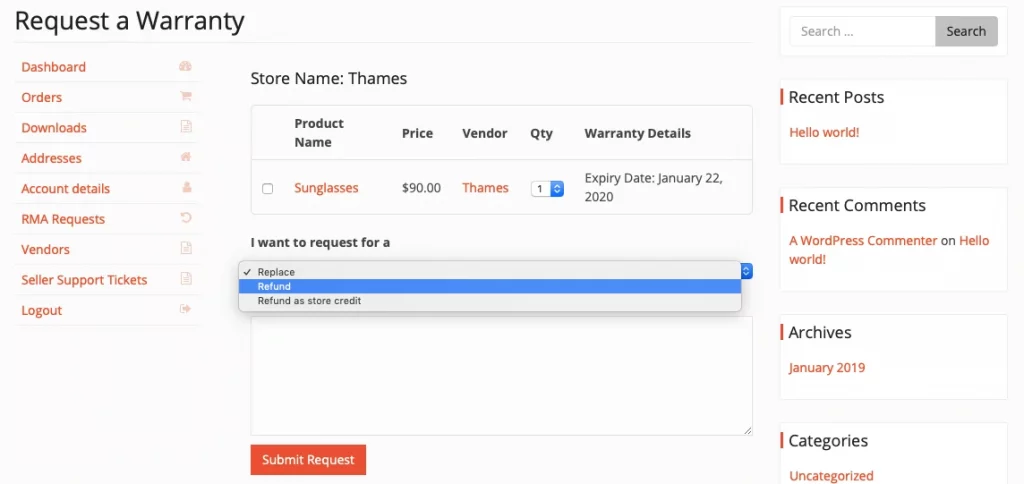
Once the product is bought by a customer, based on the RMA setting adjusted by the admin and vendor, the customer can request the replacement of the bought product, a full or partial refund, or request a Refund as store credit.
![]()
![]()
![]()
![]()
![]()
![]()
![]()
![]()
![]()
![]()