Shipping Status

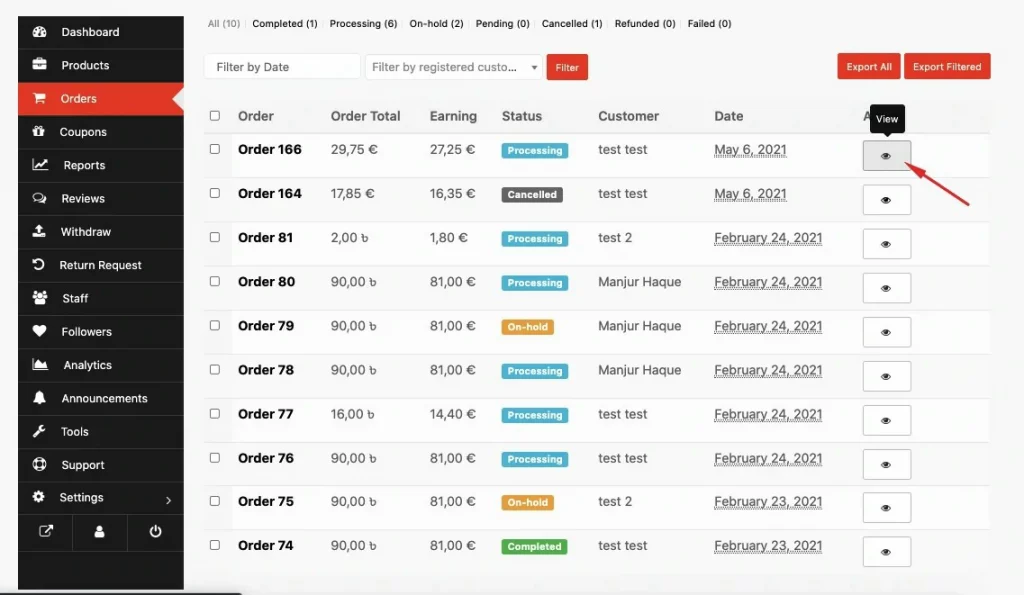


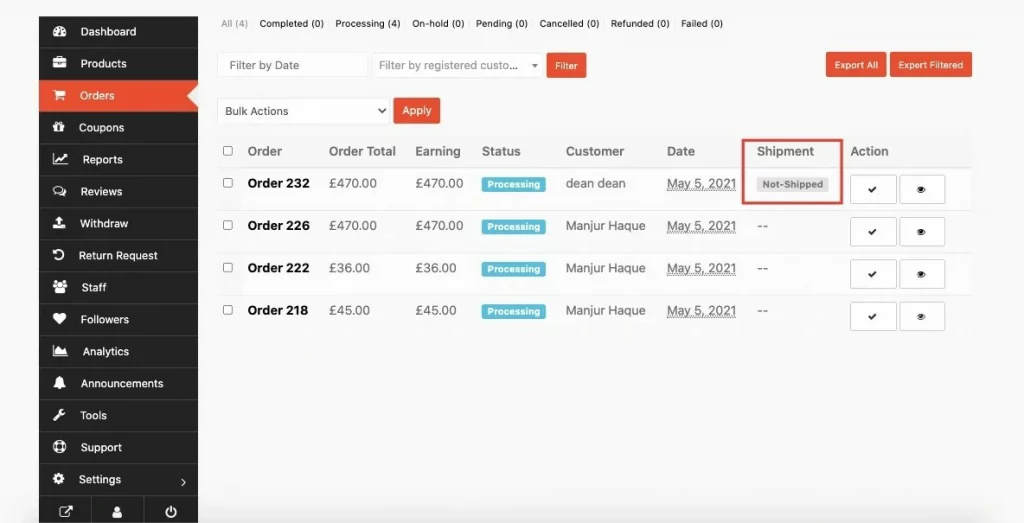
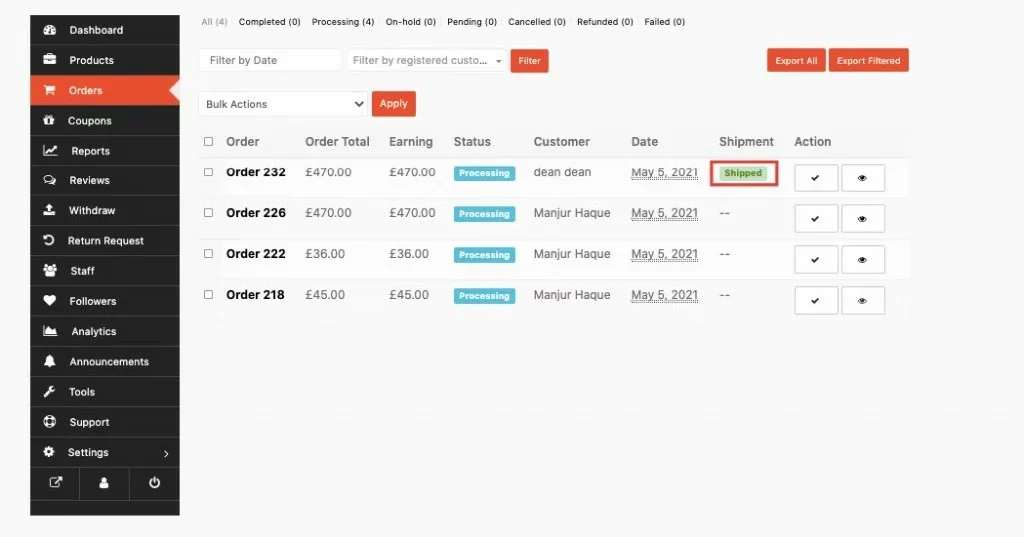
You will be able to see a column named Shipment in the Orders table (Vendor Dashboard → Orders). This column tab will show the status of the shipment status of a particular order (available only for products that require shipment).
There are 4 types of shipment statuses,
Now we are going to add shipment status to the orders. Click on the View option that will give you the details of the order.
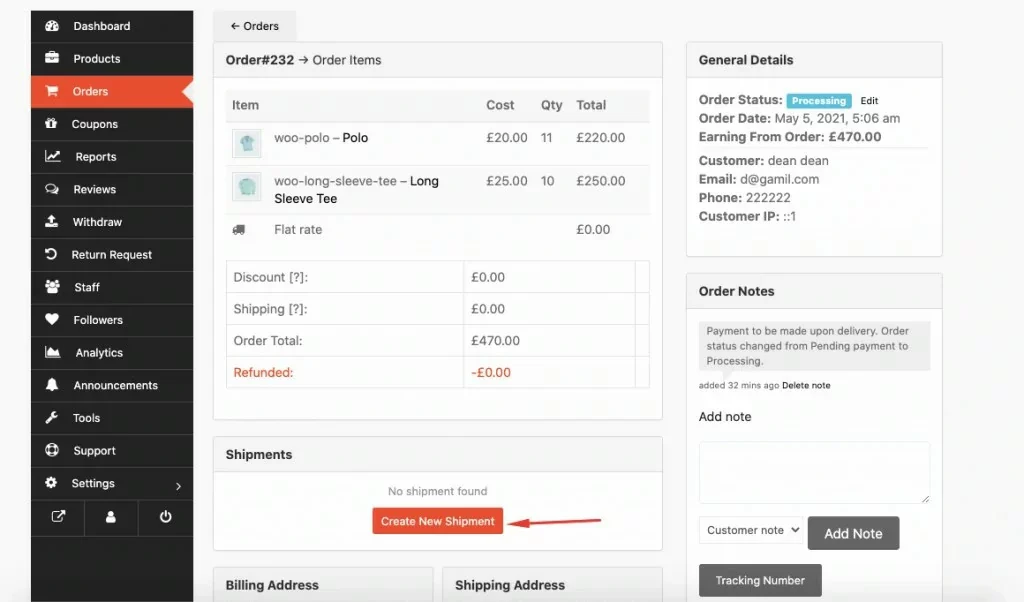
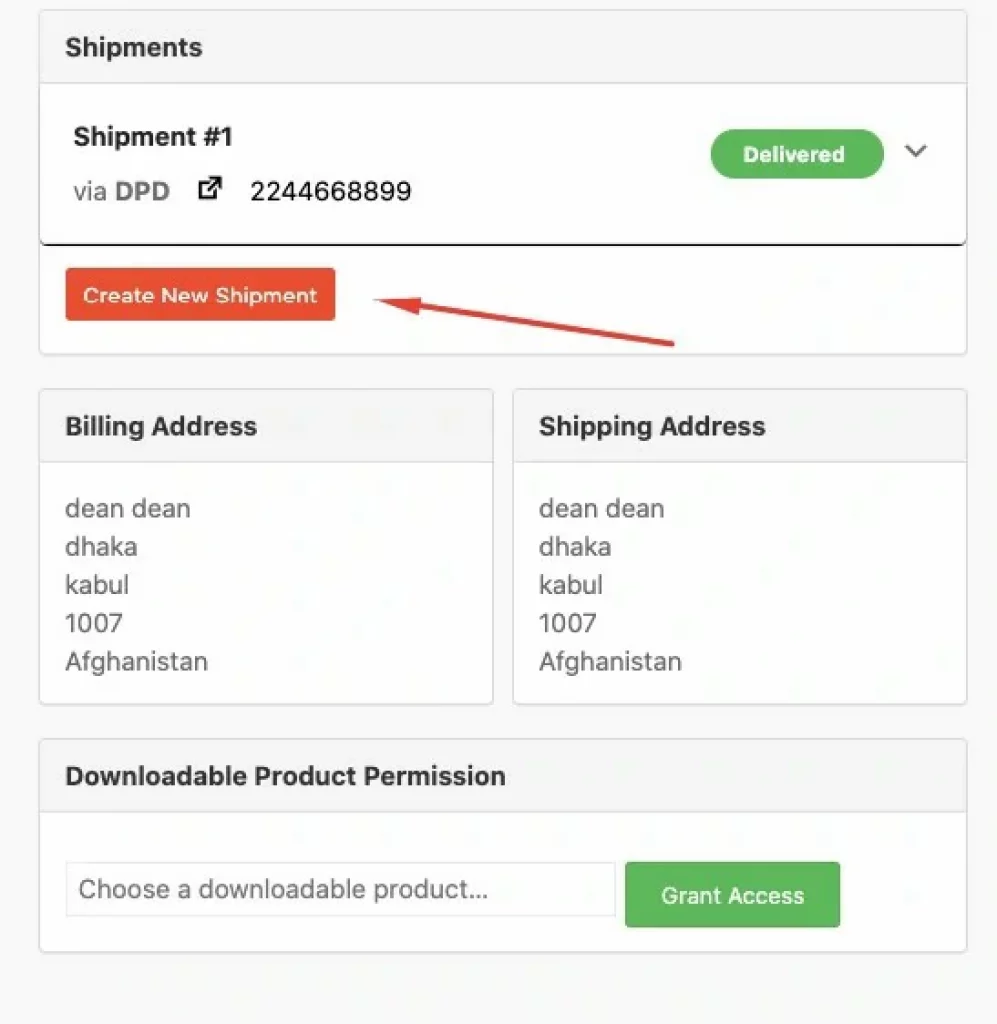
If you scroll down, you will see a Create New Shipment button. Click on it.
When you click the button, you will see a new tab will open where you need to put some details.
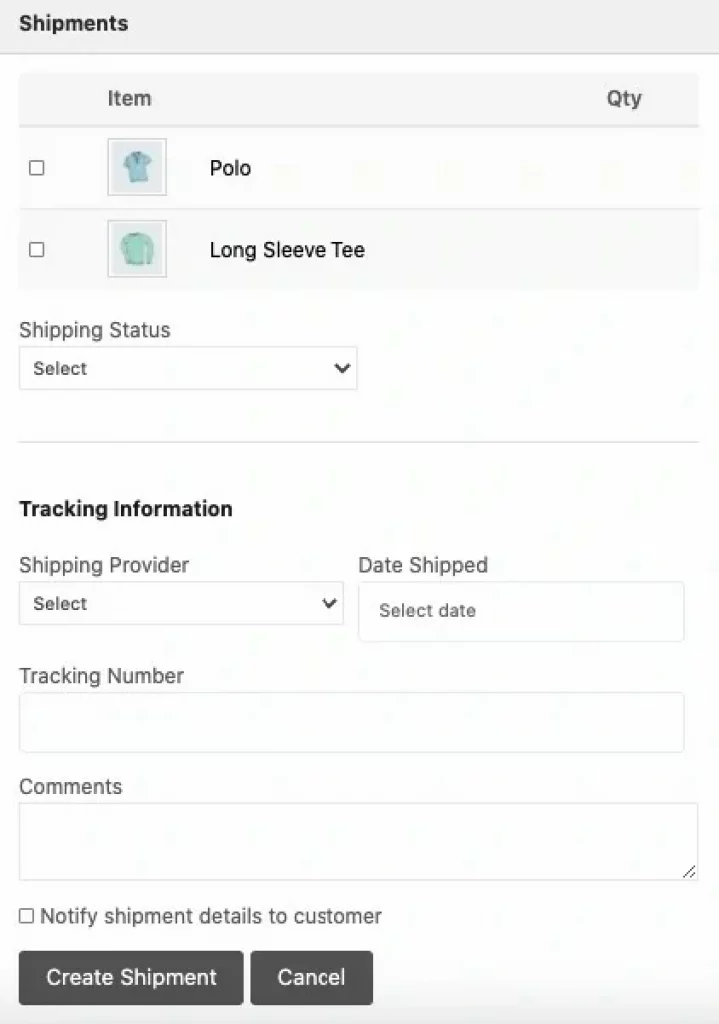
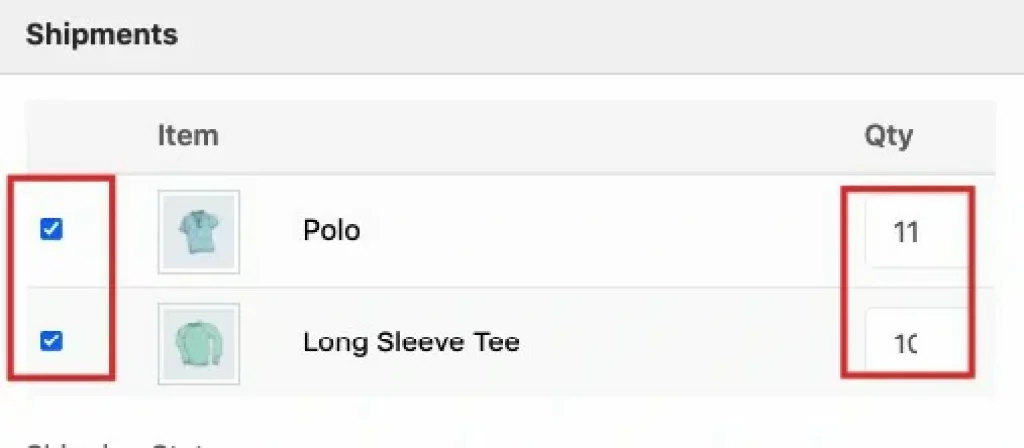
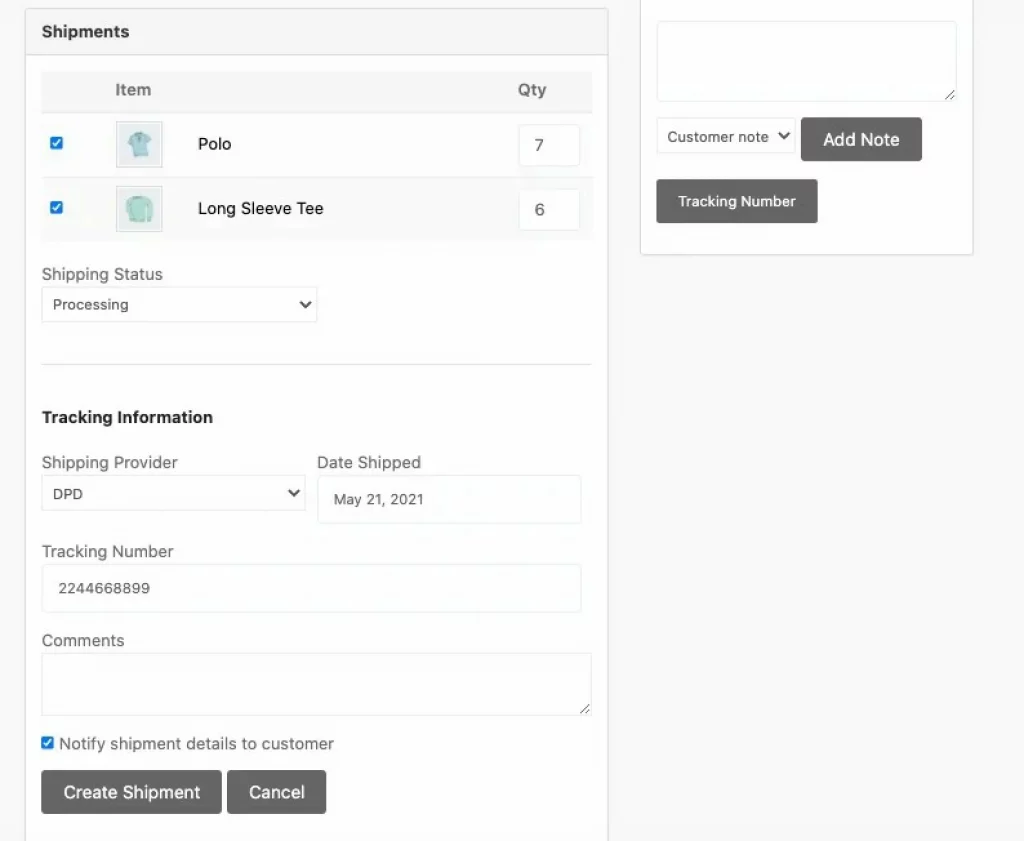
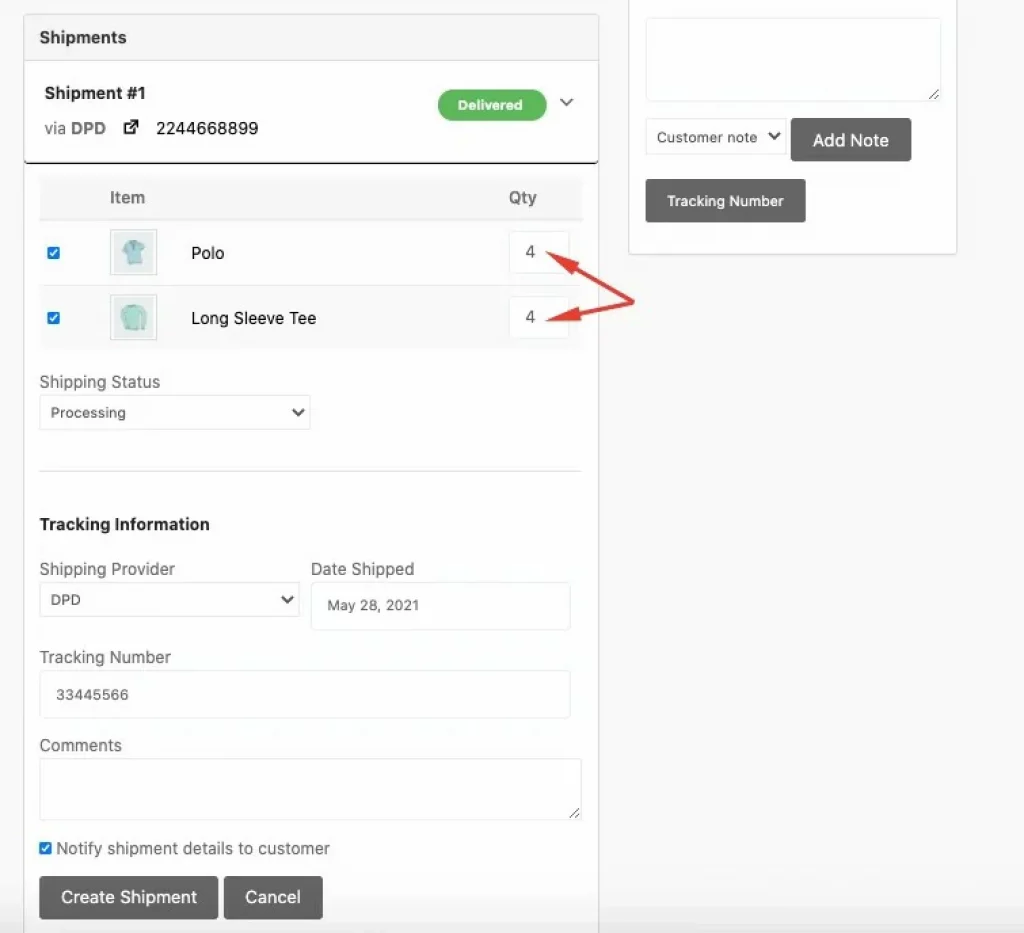
a. Order line items: In this section, all line items will be displayed here. Here you can choose which ordered item (product) you are going to add shipment for. Click the checkbox of the item you want to add shipment. A new text box will appear with a number of item counts for that item/product. If the number of item quantities is greater than 1, you can choose all item counts to be shipped at once or you can choose individual counts for a shipment.
Similarly, if the number of item/product count is greater than one, you can choose all the items by clicking the checkbox before each line item.
Note that: after you create a new shipment for your products, you will not be able to add or remove items or increase/decrease item counts. Though you will be able to change the Shipping Status and Tracking information.
b. Shipping Status: Here you can add shipping status for, to be shipped items. Click Shipping Status Dropbox and select a status that reflects the current status of this shipment.
Note: you will be able to update this shipping status later after you add shipment information.
Note 1: Vendors will not be able to add any custom shipping status from here. Only the admin has this option and the admin will be able to add, update or remove shipping status from the admin settings page.
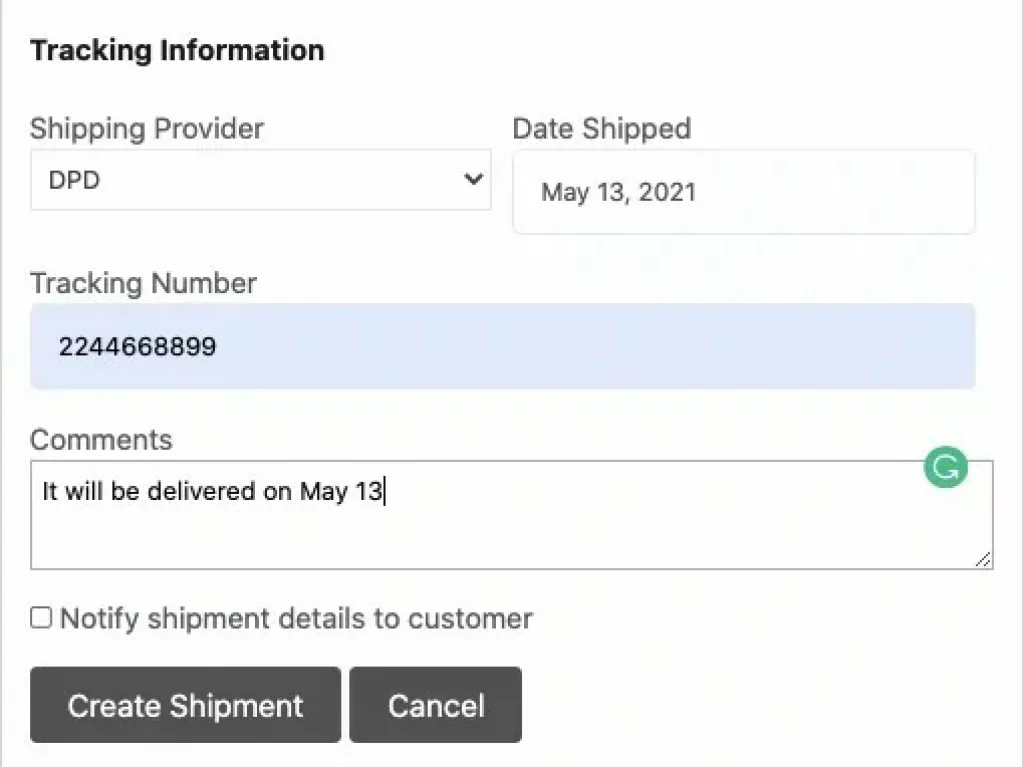
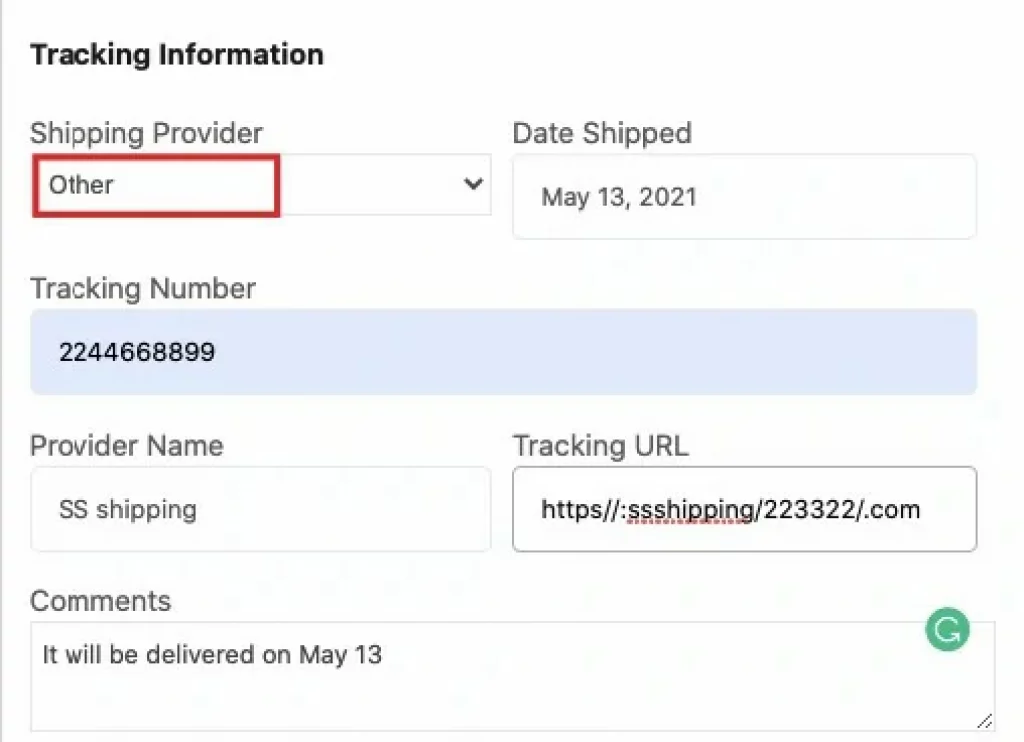
a. Shipping Provider: Here you can select any predefined Shipping Provider or add a custom shipping provider by selecting Other from the shipping Provider select box/dropdown.
If you select any predefined shipping provider, you only need to add a tracking number provided by that provider and the tracking URL will be generated automatically.
If you select Other from Shipping Provider select box, two new fields will appear named Provider Name and Tracking URL. You need to provide these two fields along with the Tracking Number field.
Note: Admin will be able to add or remove default providers from the admin settings panel.
b. Tracking Number: You will get this data from the third-party shipping provider you used to ship this order.
c. Comments: Here you can add any comments regarding this shipment and customers will be able to see this comment along with other shipment information.
d. Notify shipment details to the customer: If you check this checkbox, the customer will get an email notification after you add shipment data ie: after clicking the Create Shipment button.
e.Create Shipment: Click this button to add shipment information for this order.
f. Cancel: Click this button to discard this tab.
Enter all the required information and click the Create New Shipment button. If data validation gets passed, a new shipment row will be added after a page reload.
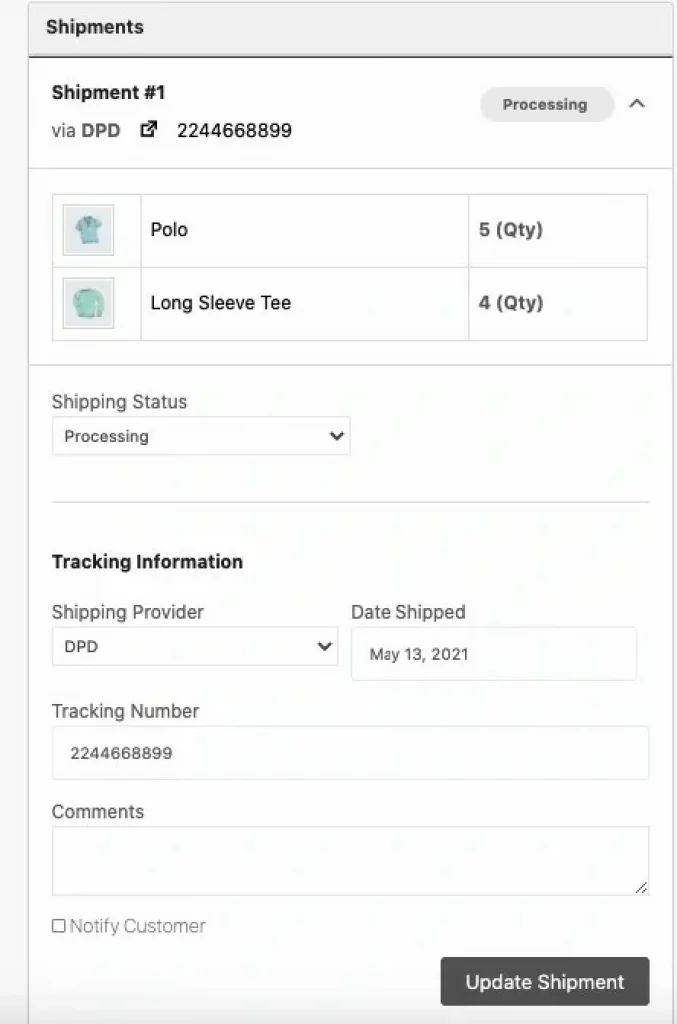
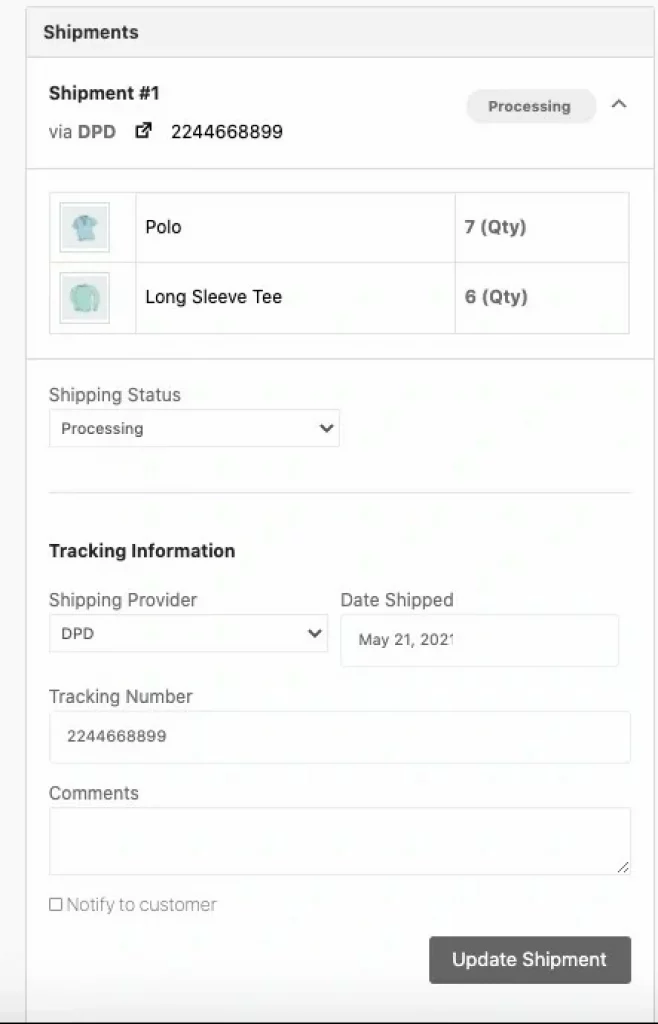
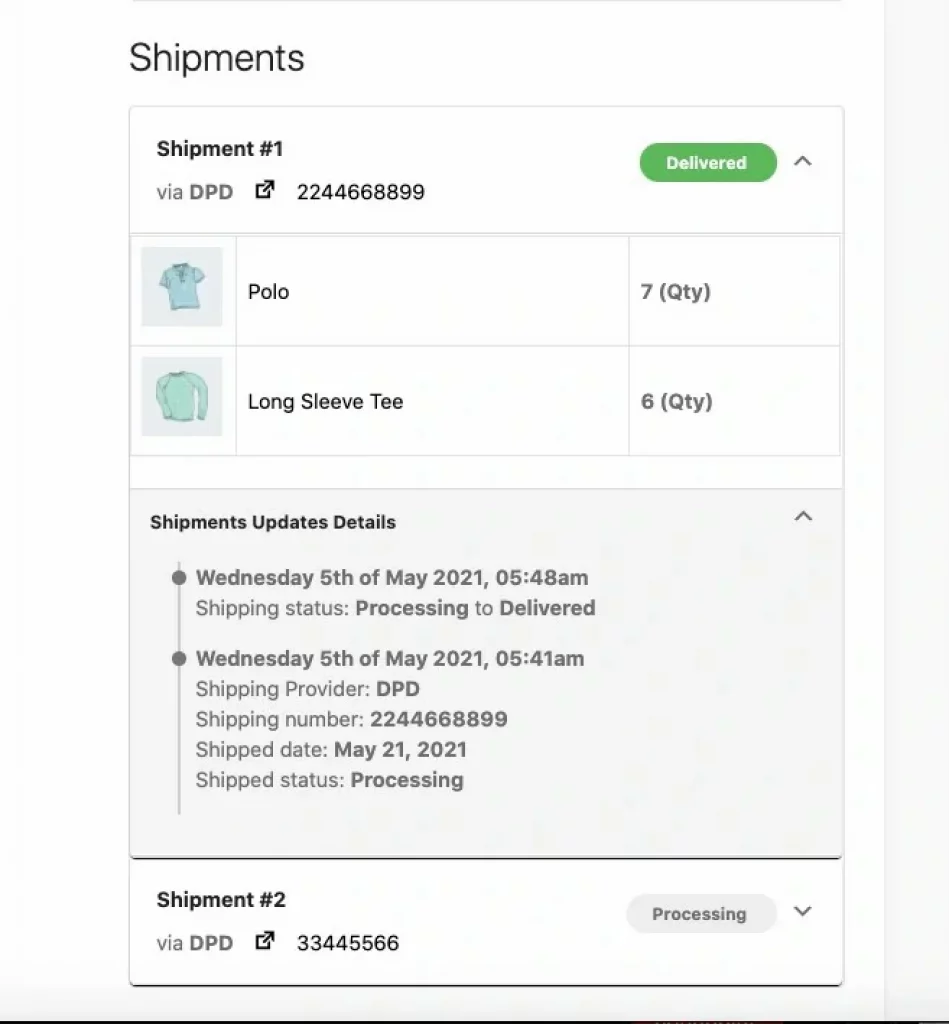
You can view details of the shipment by clicking the down arrowhead button.
Here you’ll also see a new section called Shipments Updates Timeline. All updates made for a particular shipment will be added here.
If you want to update any Shipment information for a particular order you can do it also. Go to the order details page for which you want to update shipment information. Just click on the “⌵” button of the shipment item and you will get options to update shipment data. Update what you need and click on the Update Shipment button to finish. Also, don’t forget to check the Notify the Customer checkbox if you want to notify customers about this update.
Note: Line items or line item quantity fields are not editable.
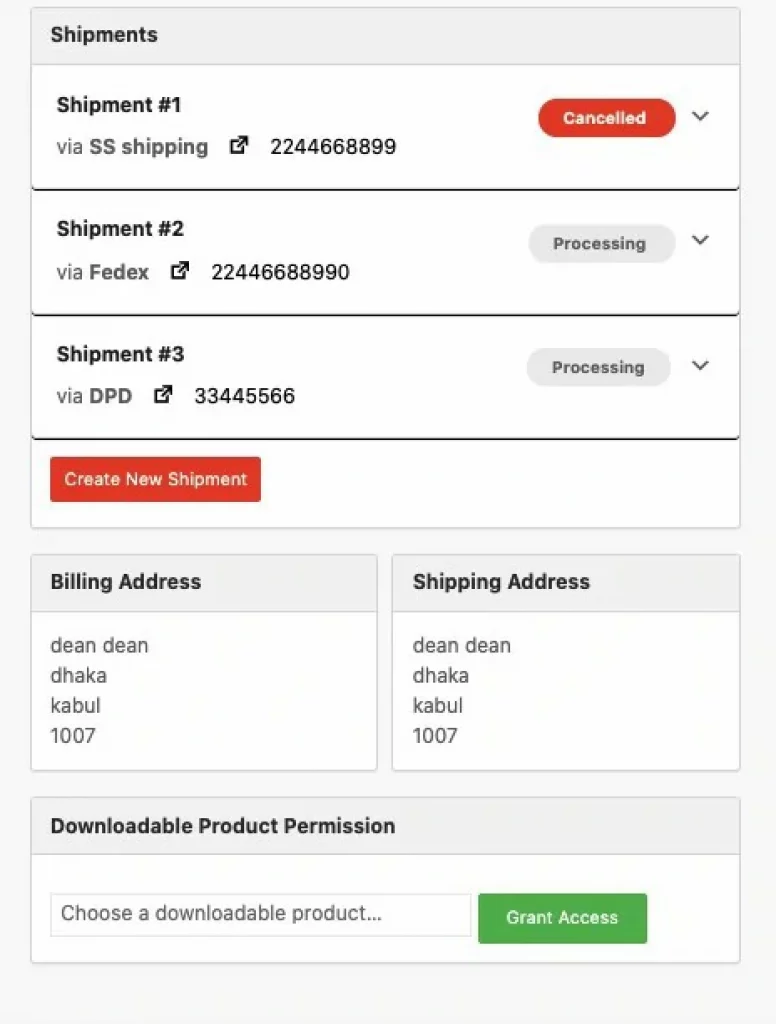
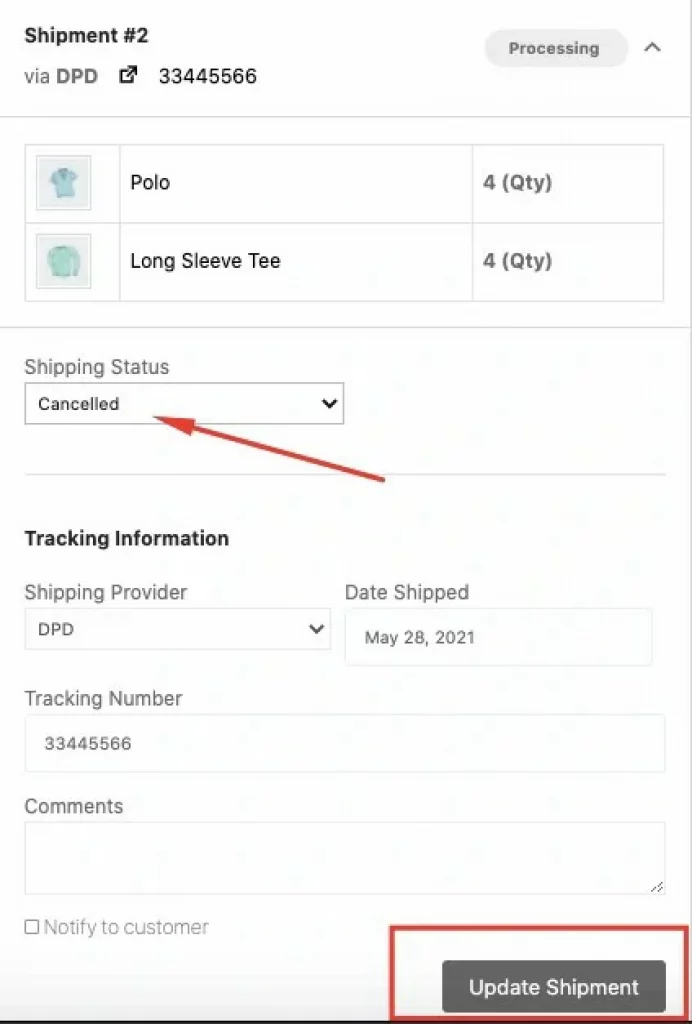
To cancel a shipment, you need to select the Cancelled status from the dropdown box and hit the “Update Shipment” button. Also if you want, you can add a note explaining the reason for canceling this shipment. Customers will be able to see this message in their Shipment update details section.
After clicking the Update Shipment button, the shipment will be canceled.
Your shipment will be canceled.
Note: When an order is Cancelled/Refunded then the Shipment feature will be disabled.
Suppose the customer has ordered 1 T-Shirt, that means you can click on the product name and ship it. If the customer has ordered 1 T-Shirt and 1 Pants, then you can choose to ship them separately or together. You can create two New Shipments and use different shipping providers.
However, if the customer has ordered 11 T-shirts and 10 Pants, then you can choose the quantity you are going to ship in one shipment. You can send 5 T-shirts and 4 Pants in one shipment or 11 T-shirts in one shipment and 10 Pants in one shipment. However, you like.
So, for your understanding, we are going to show you the split shipment system. Our customer has ordered 11 Polo Shirts and 10 Long Sleeve Tees. We are going to send 7 Polo Shirts and 6 Long Sleeve Tees in one shipment.
After choosing the quantity, you need to select the shipping status from the dropdown box. Then select the Shipping Provider, Shipment date, Tracking number, and Comments if you want. Then hit the Create Shipment button to finish.
Note: You need to provide the right tracking number you got from the shipping provider. If the tracking number is wrong then you will get an error message.
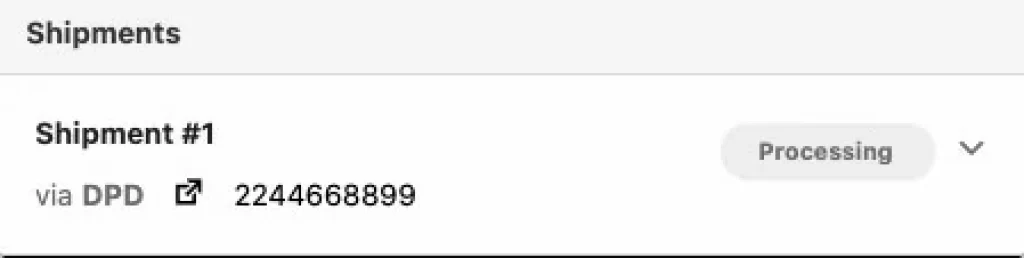
You will see that the shipment is created. If you click on the tracking id then you can see the shipment’s status.
After the Shipment is created, you will see the status ” Not-Shipped” on your shipping tab.
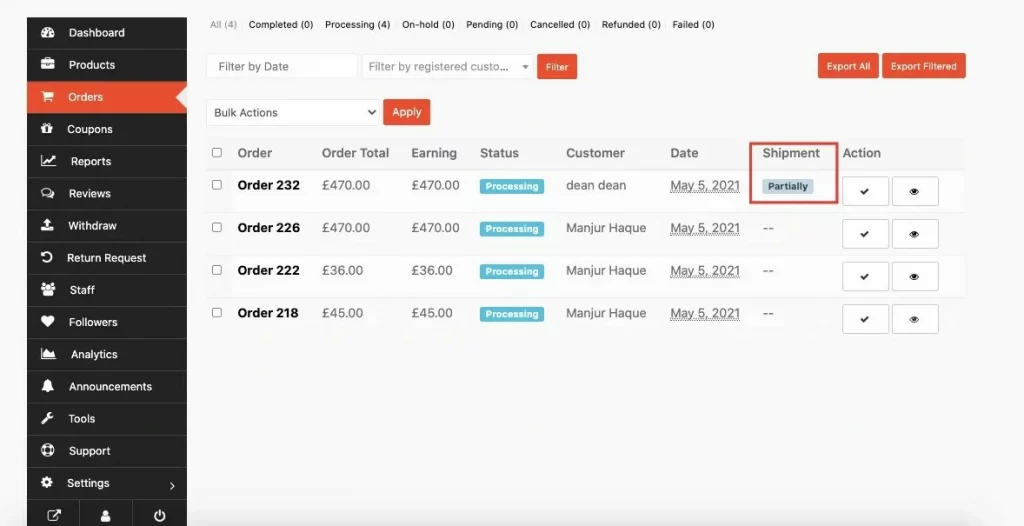
When the shipment is delivered and the status is changed from Processing to Delivered in the order details section then the status of the Shipment tab will change.
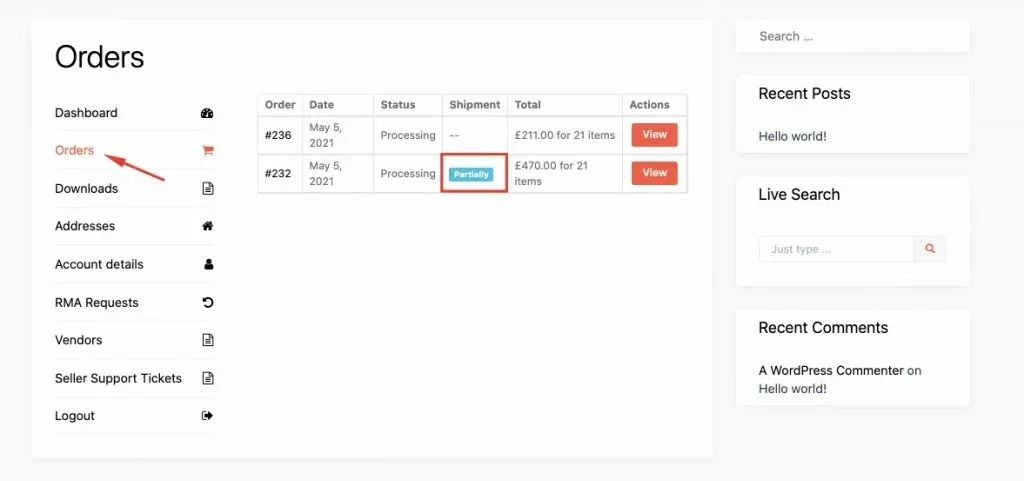
Note: The reason the status is showing “Partially” is that we have shipped 7 Polo Shirts and 6 Long Sleeve Tees out of 11 and 10 respectively.
To ship the rest of the products go back to the Order details and click on Create New Shipment again to create another shipment.
When you create another shipment, you will see that the quantity is calculated automatically. There are 4 Polo Shirts (11-7=4) and 4 Long Sleeve Tee’s (10-6=4) left to deliver.
Add the shipping details like before and click on the Create Shipment button to finish.
And when you deliver the products, the status on the Shipment tab will change to Shipped.
That is how you can easily create and track Shipping Status.
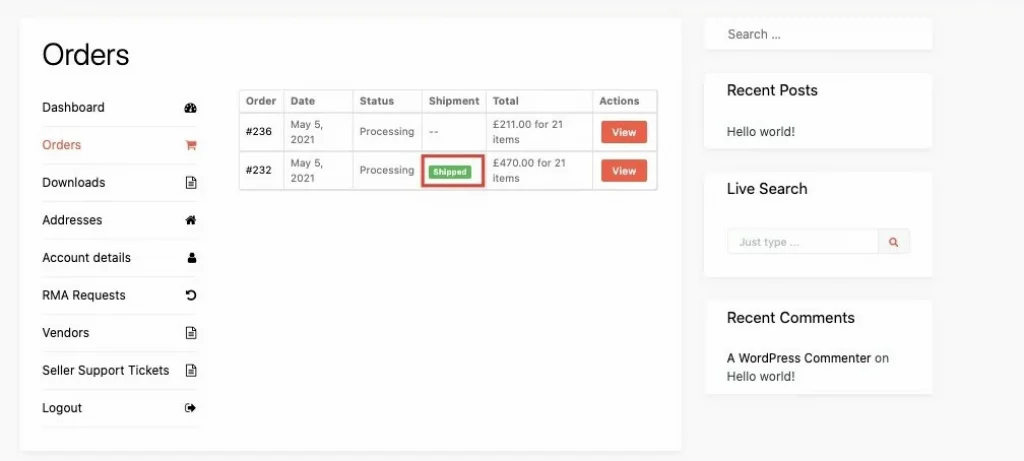
However, the customer can also view the shipment details from their account. If the customer navigates to My Account–> Orders, they will be able to see the shipment tab and its status just like the vendor.
If the customer clicks on the View option, he/she will be able to see the shipment details.
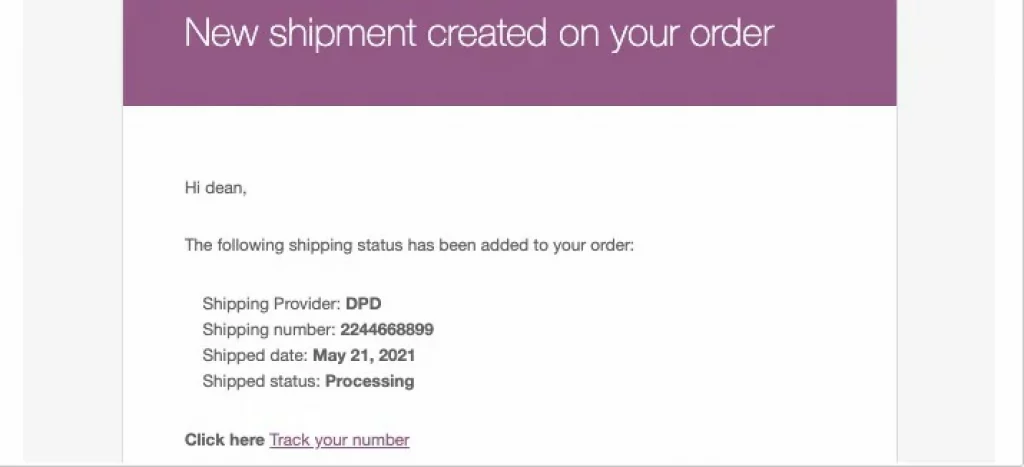
If the vendor selects the “Notify Shipment Details to Customer” option while creating a shipment, then the customer will get an email that will contain the shipment details.
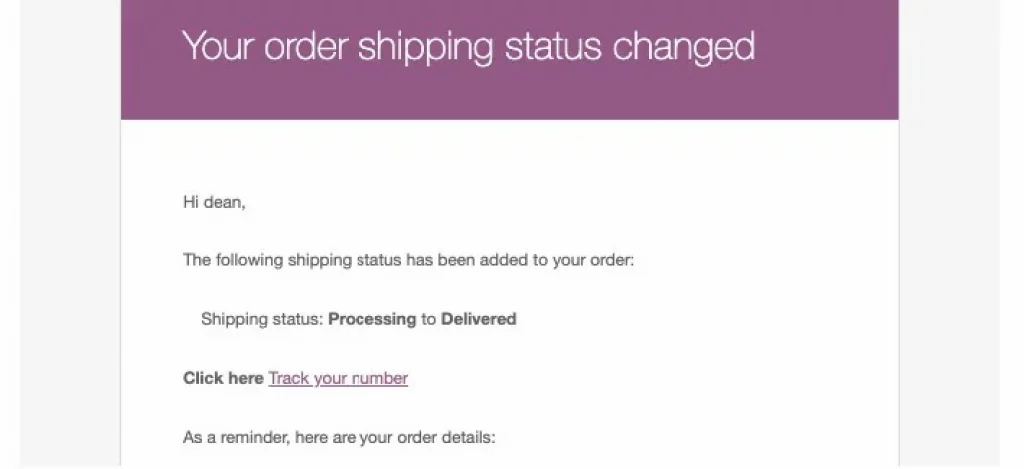
And when the shipping status is changed then the customer will also receive an email,
When the full order is delivered, then the status will change to Shipped.
![]()
![]()
![]()
![]()
![]()
![]()
![]()
![]()
![]()
![]()